No Products in the Cart


Still manually checking form responses in your inbox?
What if every submission landed neatly in Airtable — and you got a clean Slack message instantly?
That's exactly what this workflow does.
No code, no delay — just a smooth automation to keep your team in the loop:
Tally → Airtable → Slack
Build an automated flow that:
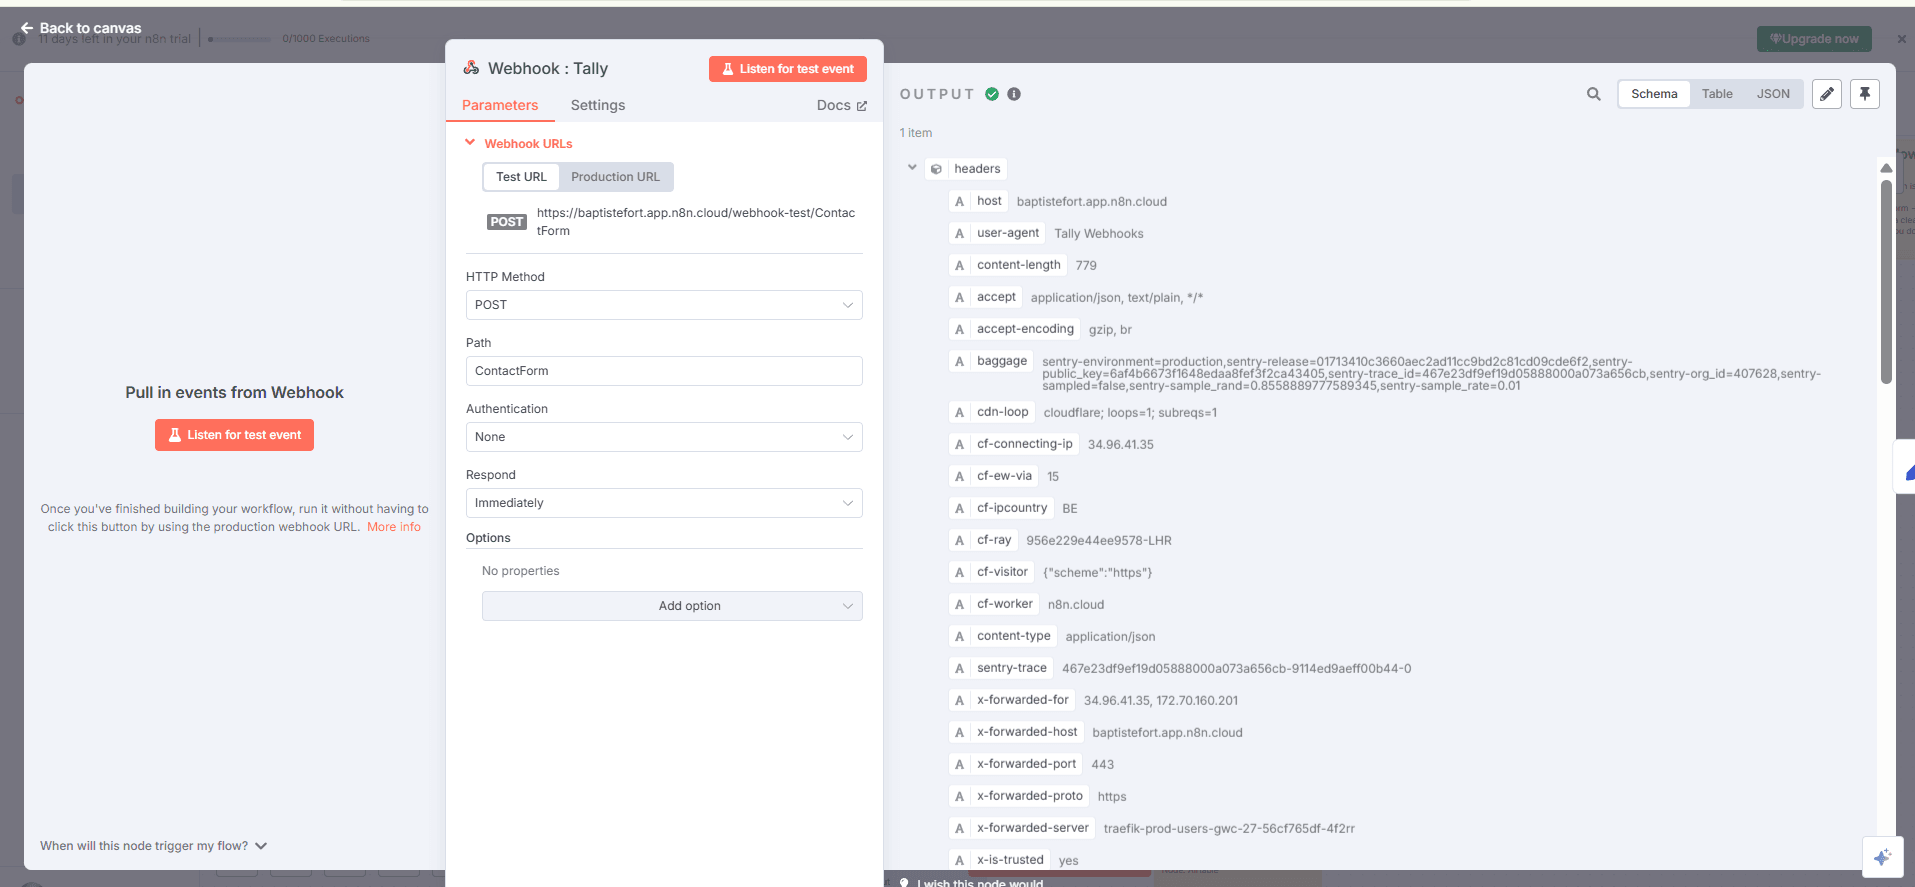
A Webhook node in POST mode.
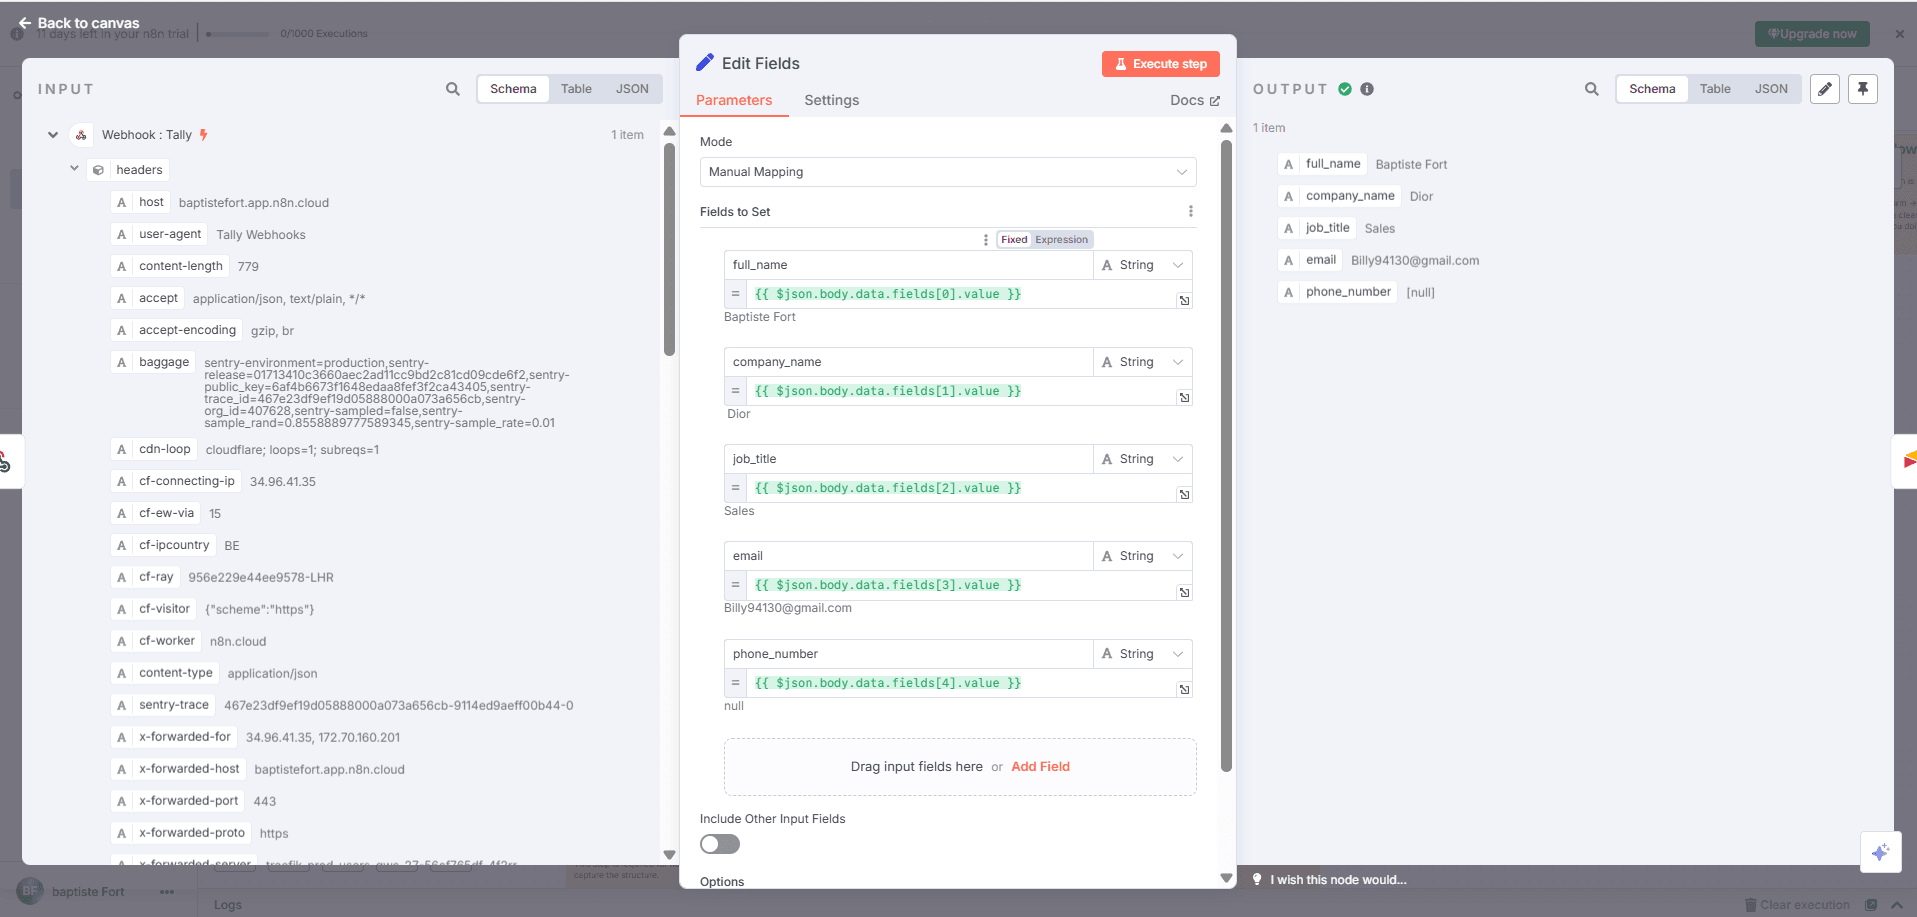
After connecting Tally, you now receive raw data inside a fields[] array.
Let's convert that into something clean and structured.
Extract key info like Full Name, Email, Phone, etc. into simple keys.
Add a Set node to remap and clean the fields.
Use the data preview in the Webhook node to check the correct order.
Output
You now get clean data like:
{ "Full Name": "Jane Doe",
"Email": " jane@example.com ",
"Phone": "+123456789" }

✅ Once the data is cleaned, let's store it in Airtable automatically.
Goal
Create one new Airtable row for each form submission.
What we're setting up
An Airtable – Create Record node.
Technical
Output
Each submission creates a clean new row in your Airtable table.

⌛ After saving to Airtable, it's a good idea to insert a short pause — this prevents actions like Slack messages from stacking too fast.
Goal
Wait a few seconds before sending a Slack notification.
What we're setting up
A Wait node for X seconds.
✅ Technical
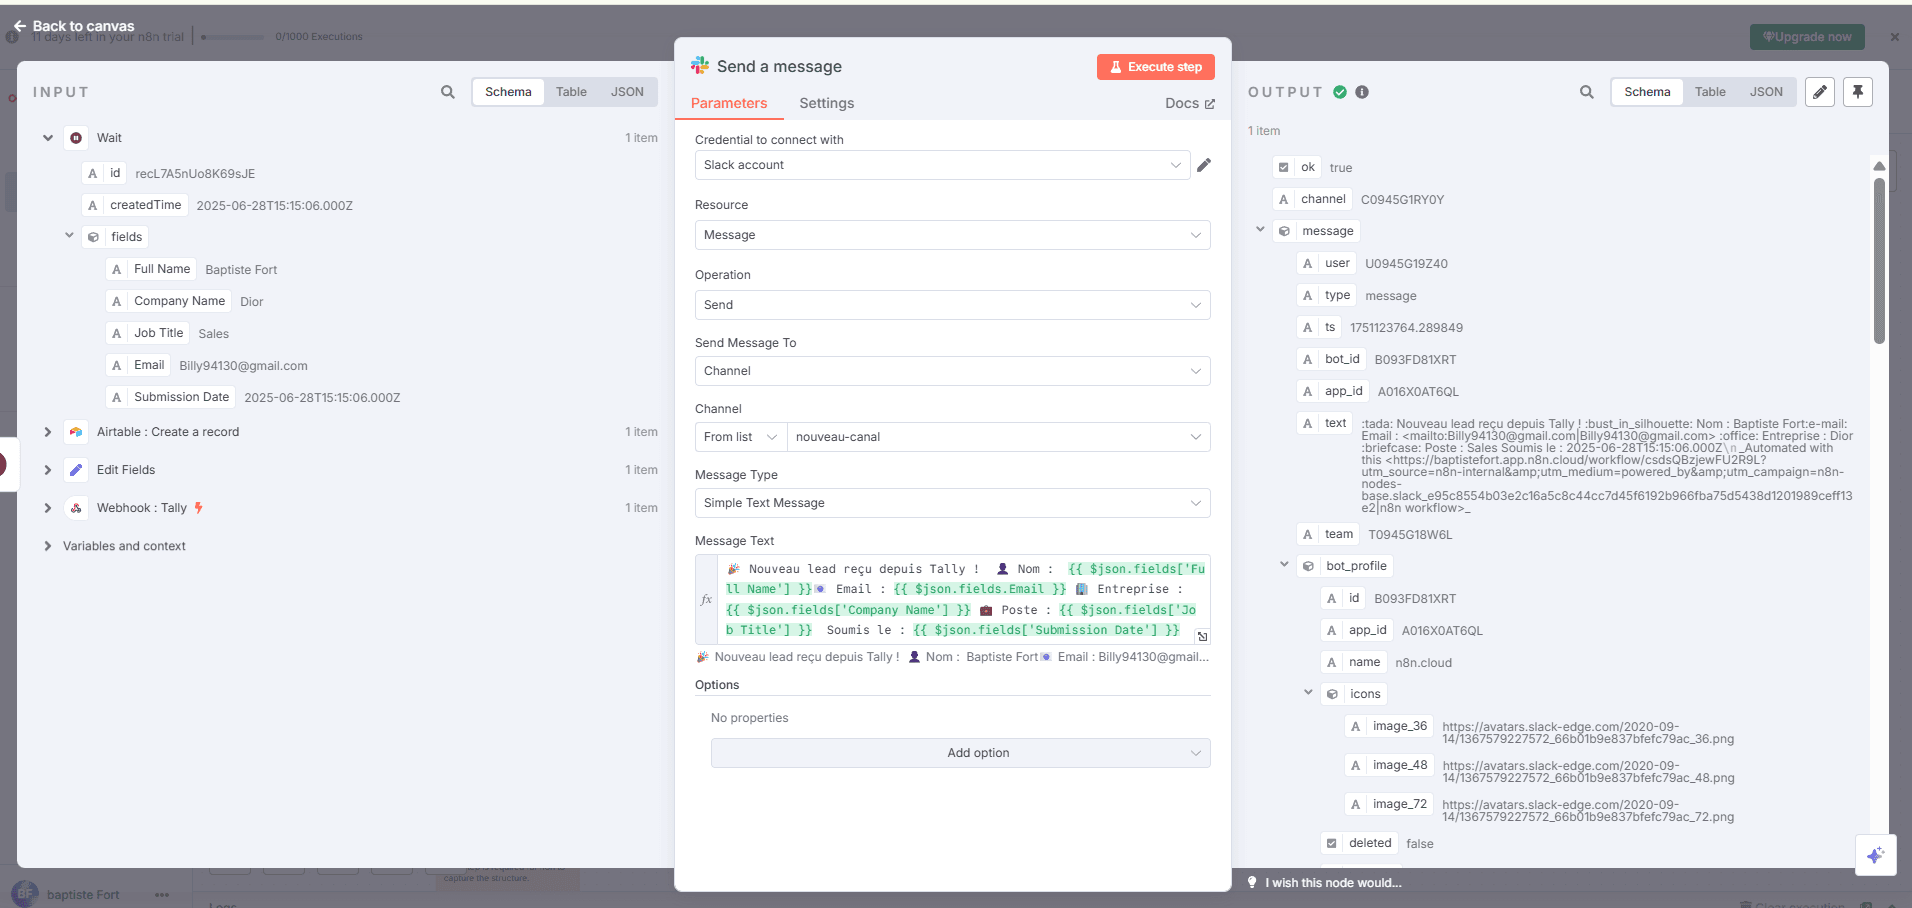
💬 Now that the record is stored, let's send a Slack message to notify your team.
Goal
Automatically alert your team in Slack when someone fills the form.
What we're setting up
A Slack – Send Message node.
Technical
New lead received!
Name: {{$json["Full Name"]}}
Email: {{$json["Email"]}}
Phone: {{$json["Phone"]}}
Output
Your Slack team is notified instantly, with all lead info in one clean message.
Workflow Complete
Your automation now looks like this:
Tally → Clean → Airtable → Wait → Slack
Every submission turns into clean data, gets saved in Airtable, and alerts your team on Slack — fully automated, no extra work.
